
Ansible on Azure DevOps Pipelines
Hello Everyone, in this article, I will talk about how we can automate the server configuration software Ansible through the pipeline on the Azure DevOps Server. On the Internet, there are many Turkish resources about Ansible, therefore I will not discuss details and working logic of Ansible in this article. Instead I have added a few reference links below. So, but what is Ansible? It would not be bad if we briefly describe it.
A rough definition for Ansible would be an automation software used for server configurations. It is a free software platform that helps you configure the servers you manage from a single point. It was first launched in 2012. Later, it was purchased by RedHat and used both as embedded item in RedHat products and continues to be developed to serve as a separate software. If you want to perform DevOps or want to automate everything, Ansible will be an indispensable automation tool for you. Let us see how we can use Ansible on our CI / CD lines. As I mentioned in the title, I will use the
Pipelines
component of
Azure DevOps Server
as a CI / CD application.
NOTE: I will work on my examples on the Azure DevOps Server, which is also here on premise. There are some differences in the Azure DevOps service in the Cloud. However, the working logic is the same in both.
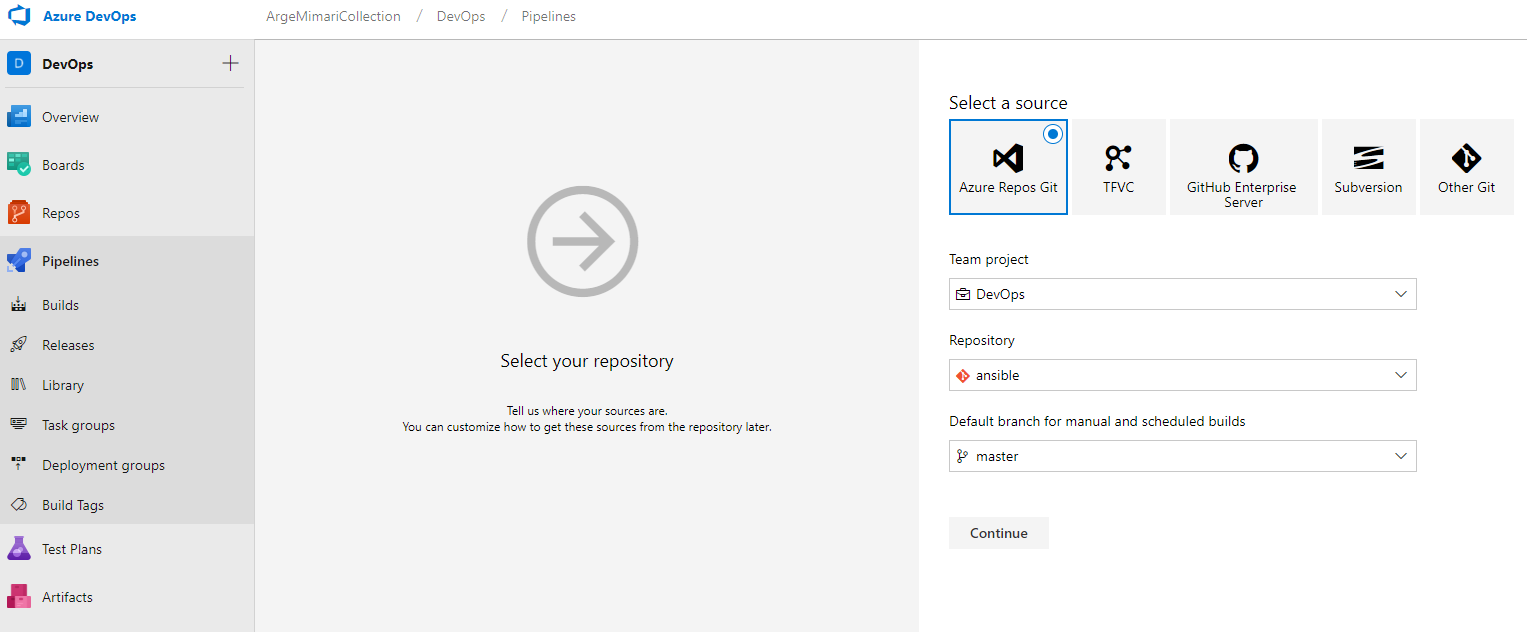
First, we have to prepare the operations we will run with Ansible with the playbook file structure and to keep it in a repo. I used the Azure Repos for this purpose. You can access the structure of the playbook file structure that I have prepared below from
this link. The necessary yaml files for beats agents installations on the relevant servers are here. This structure is currently in the Azure repos. Let us look at what needs to be performed in the pipeline to make this structure work.
Dockerized Ansible
First, a container with the Ansible application is added to a Dockerfile which contains the relevant environments and commands in the repo where the playbooks are located in order to operate the container. You can access the Dockerfile from this link. There should also be the necessary ansible commands for playbooks to be run with Ansible (ansible-playbook -i inventory.ini $ {ROLE_NAME}) The $ (ROLE_NAME) parameter here is set when the Build is run.
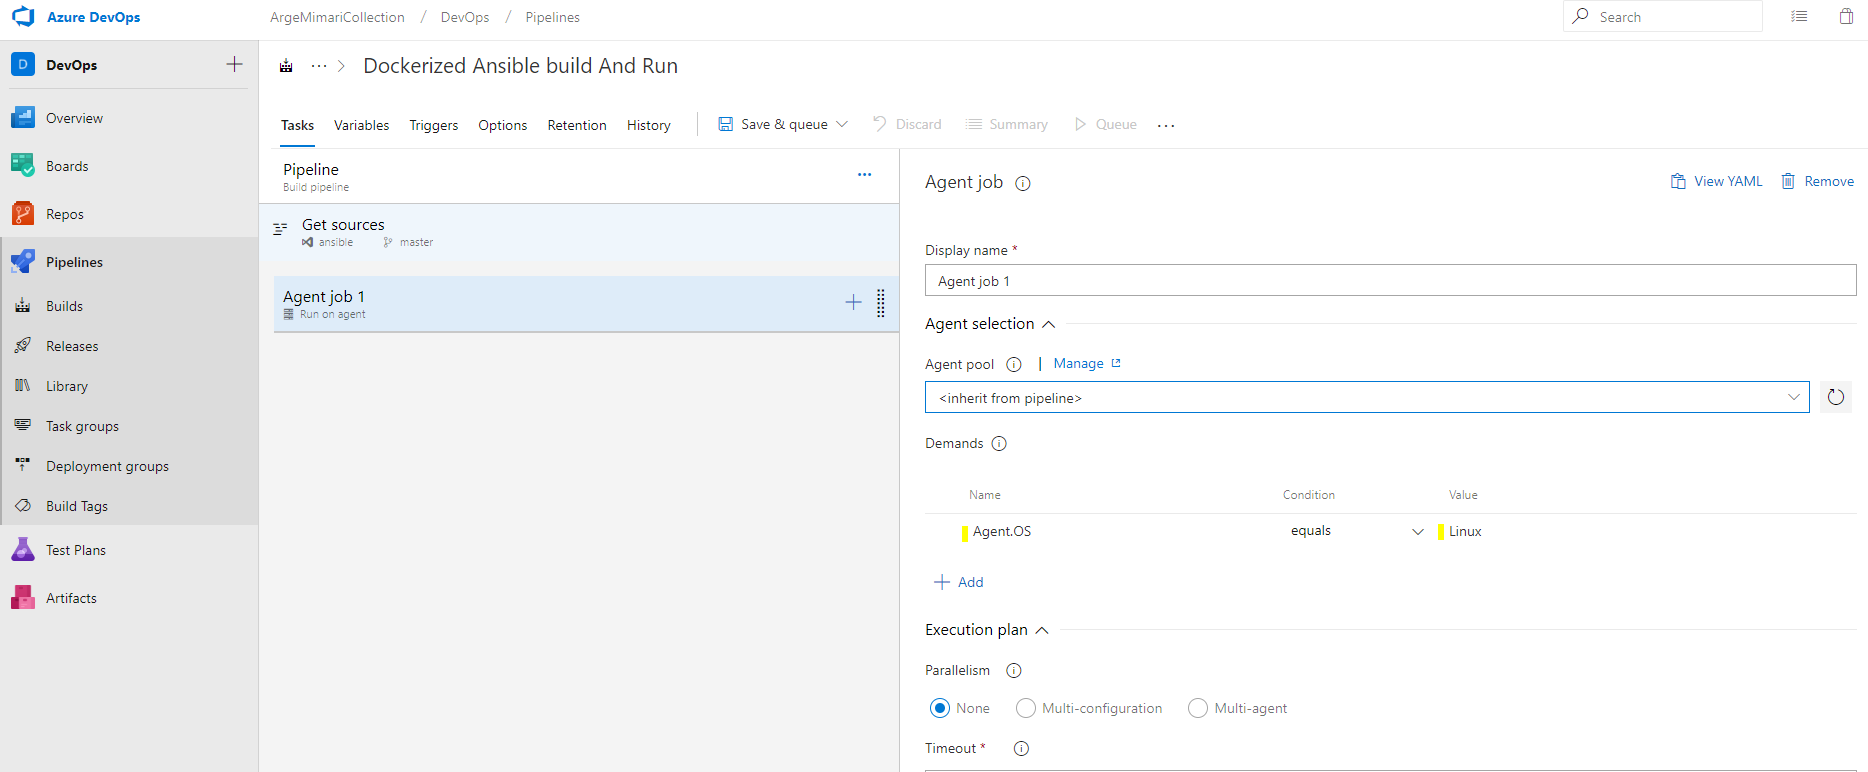
 When I click “empty job” and go to the next step
 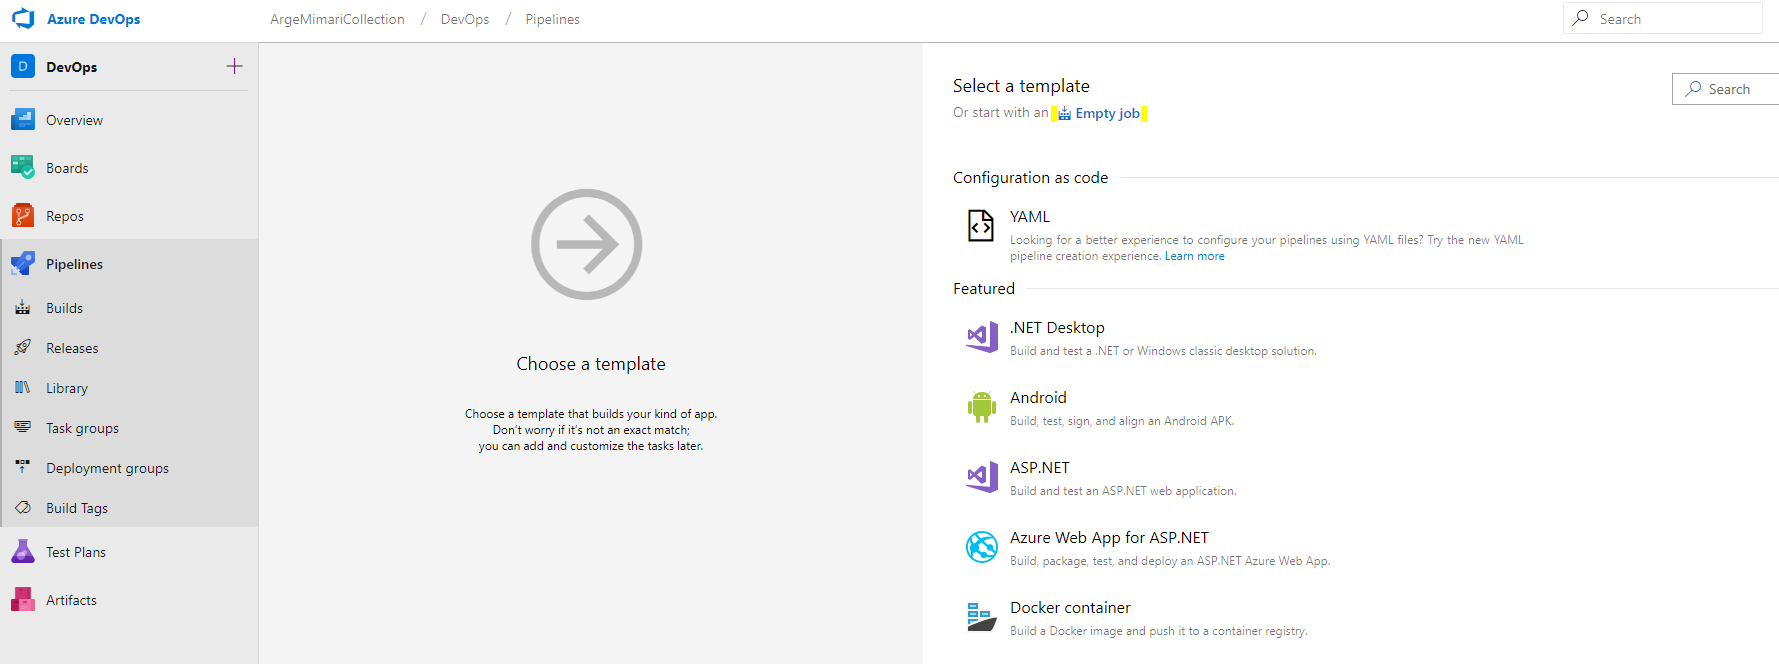 In this step, select the agent pool that Build will use.
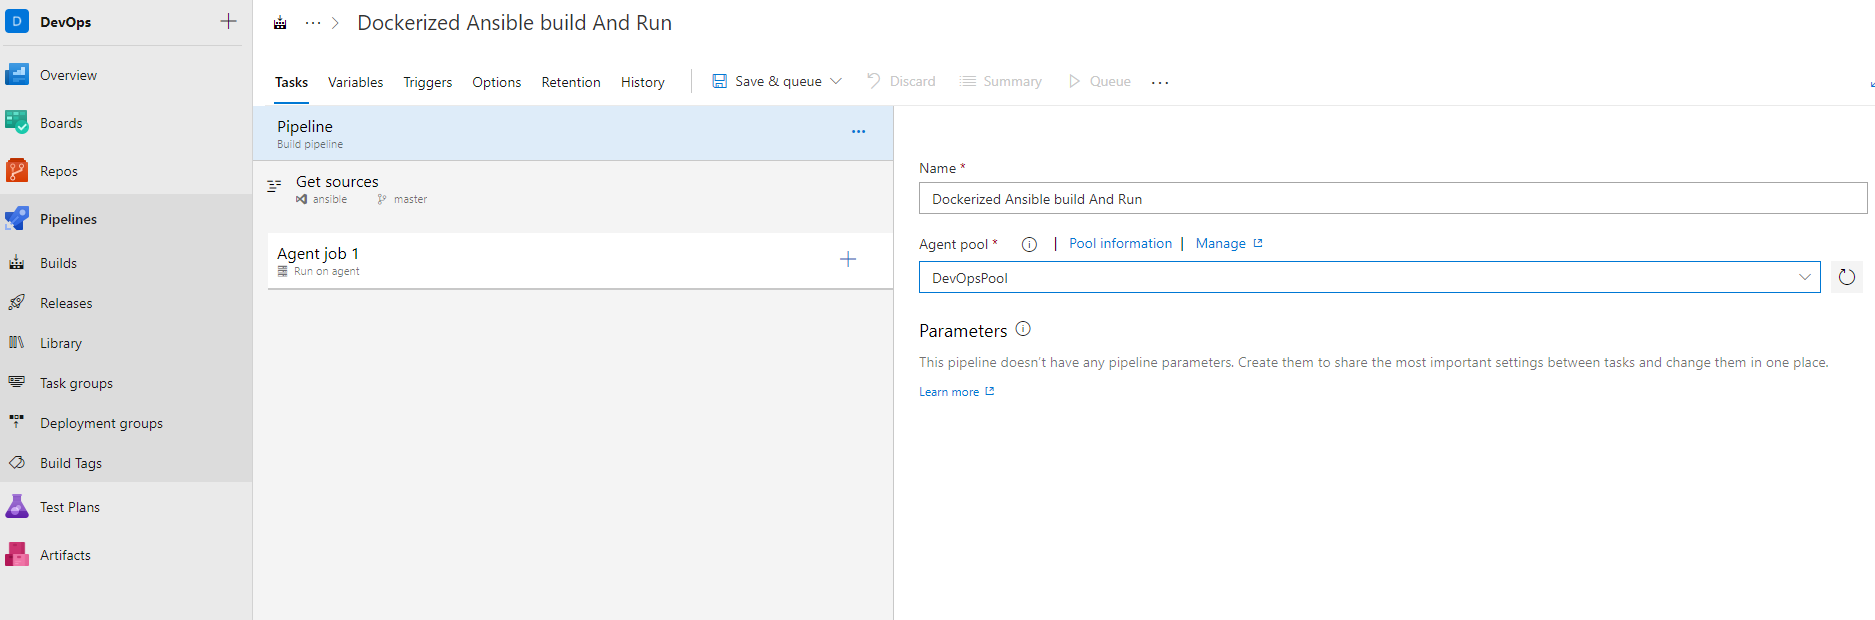
There may be more than one build agent in the agent pool and these agents may be in the linux-windows operating systems. Since we will run the Ansible application on a container, I add Demand in the Agent job feature to tell that this build step will work on an agent with a linux operating system.
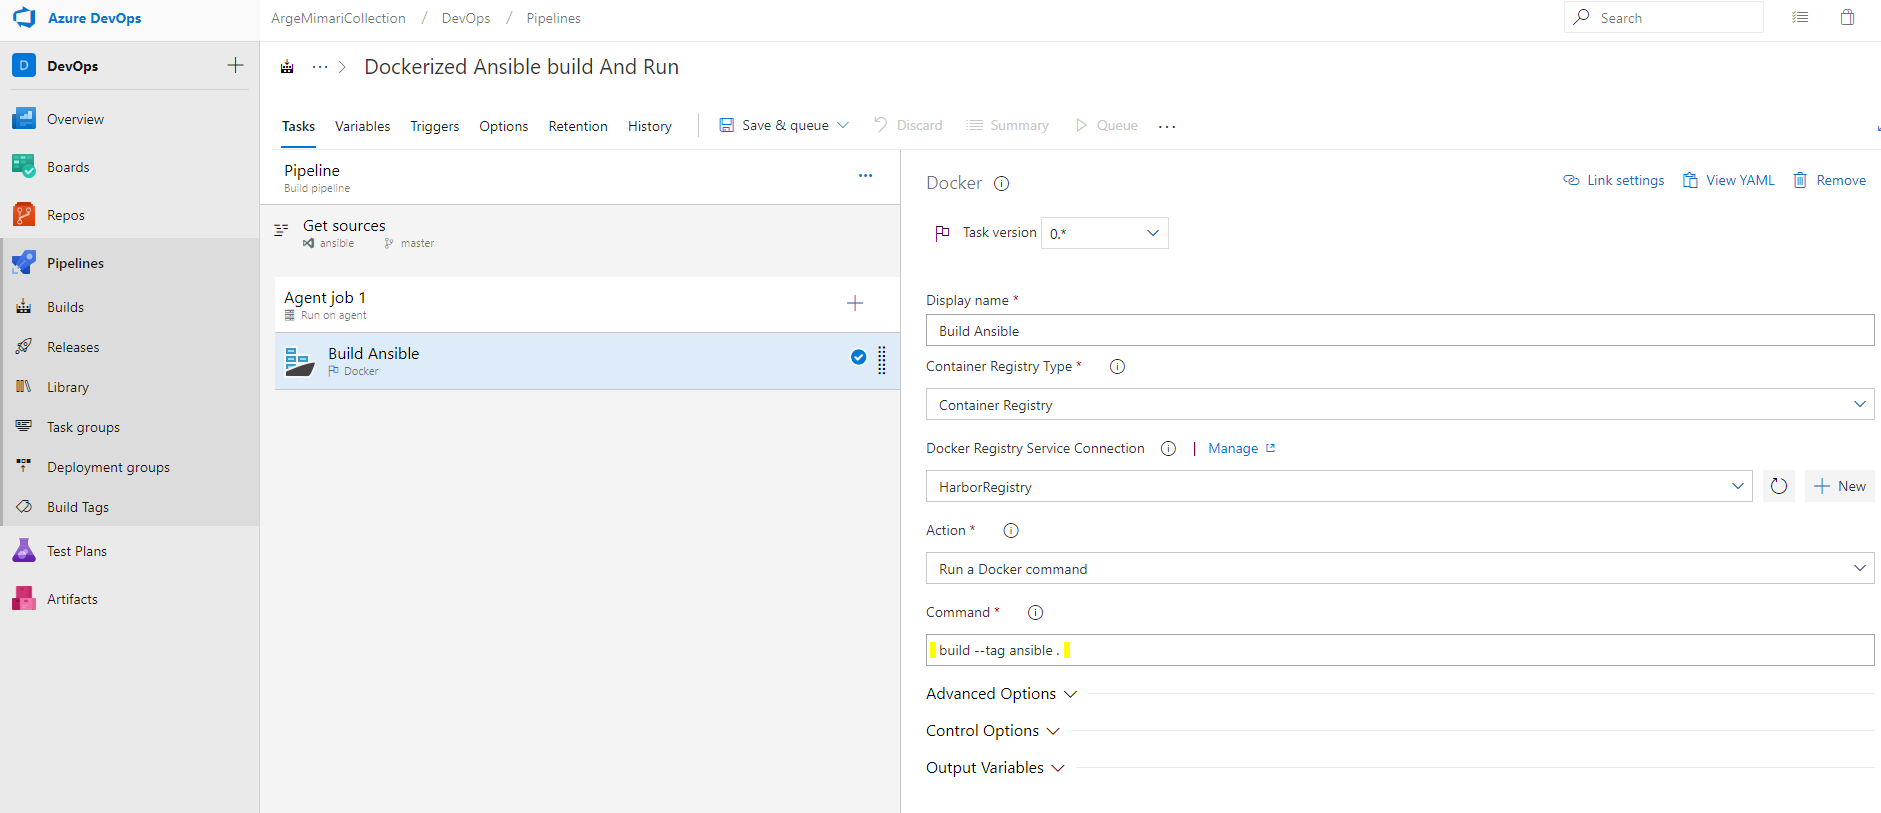
Ansible image build and push
Docker task is added to the Agent Job to build the Dockerfile and send the resulting image to the registry. Here, one of the services defined in the Docker Registry Service Connection is selected and the build - tag ansible . command is written. As a result of this task, Dockerfile is tagged with ansible tag and will be built and the generated image will be pushed to the relevant registry service.
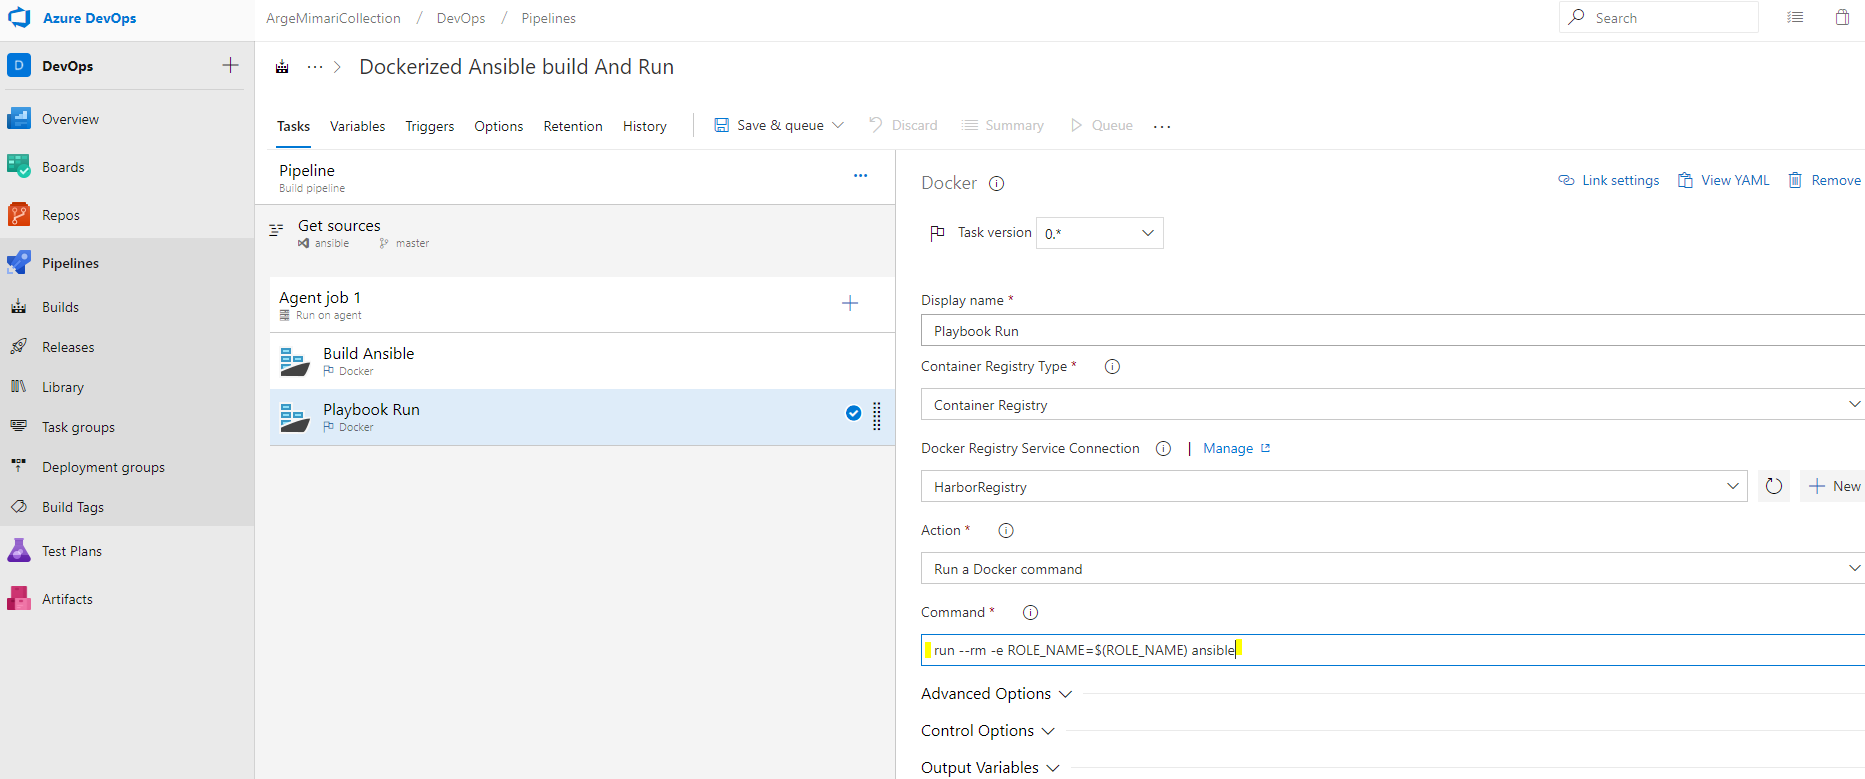
Running playbook
The image docker created in the Build step to run the playbooks. The command should be
Run-rm -e ROLE_NAME = $ (ROLE_NAME)
ansible. Using this Command, the image with ansible tag is run.The
ROLE_NAME
arameter is set during build. As a result of this task, a container is operated with an image with ansible tag. Playbooks are run with the set ROLE_NAME parameter and the command given in Dockerfile
ROLE_NAME
Container Cleanup
Finally, when the operations are completed, the relevant container and image are cleaned.
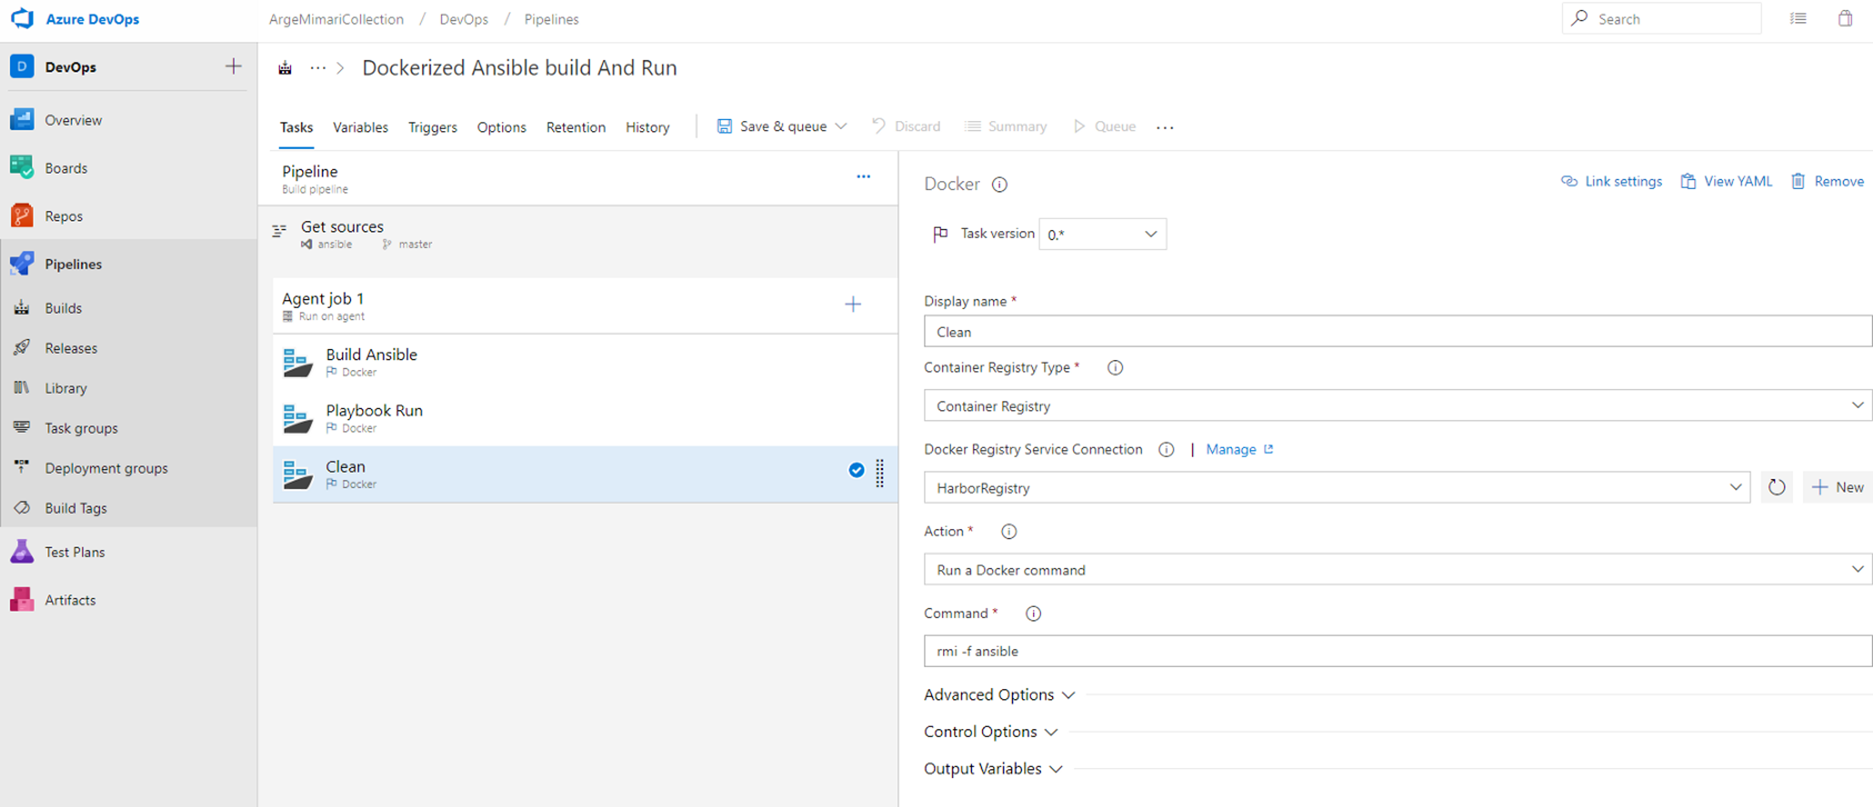
If you want to implement a good CI / CD practice, you should clean the containers you have used. The pipeline design here creates an image file with the current Dockerfile and uses it to operate a container. It performs its operations and cleans the relevant container and image file.
Ansible Build Execute
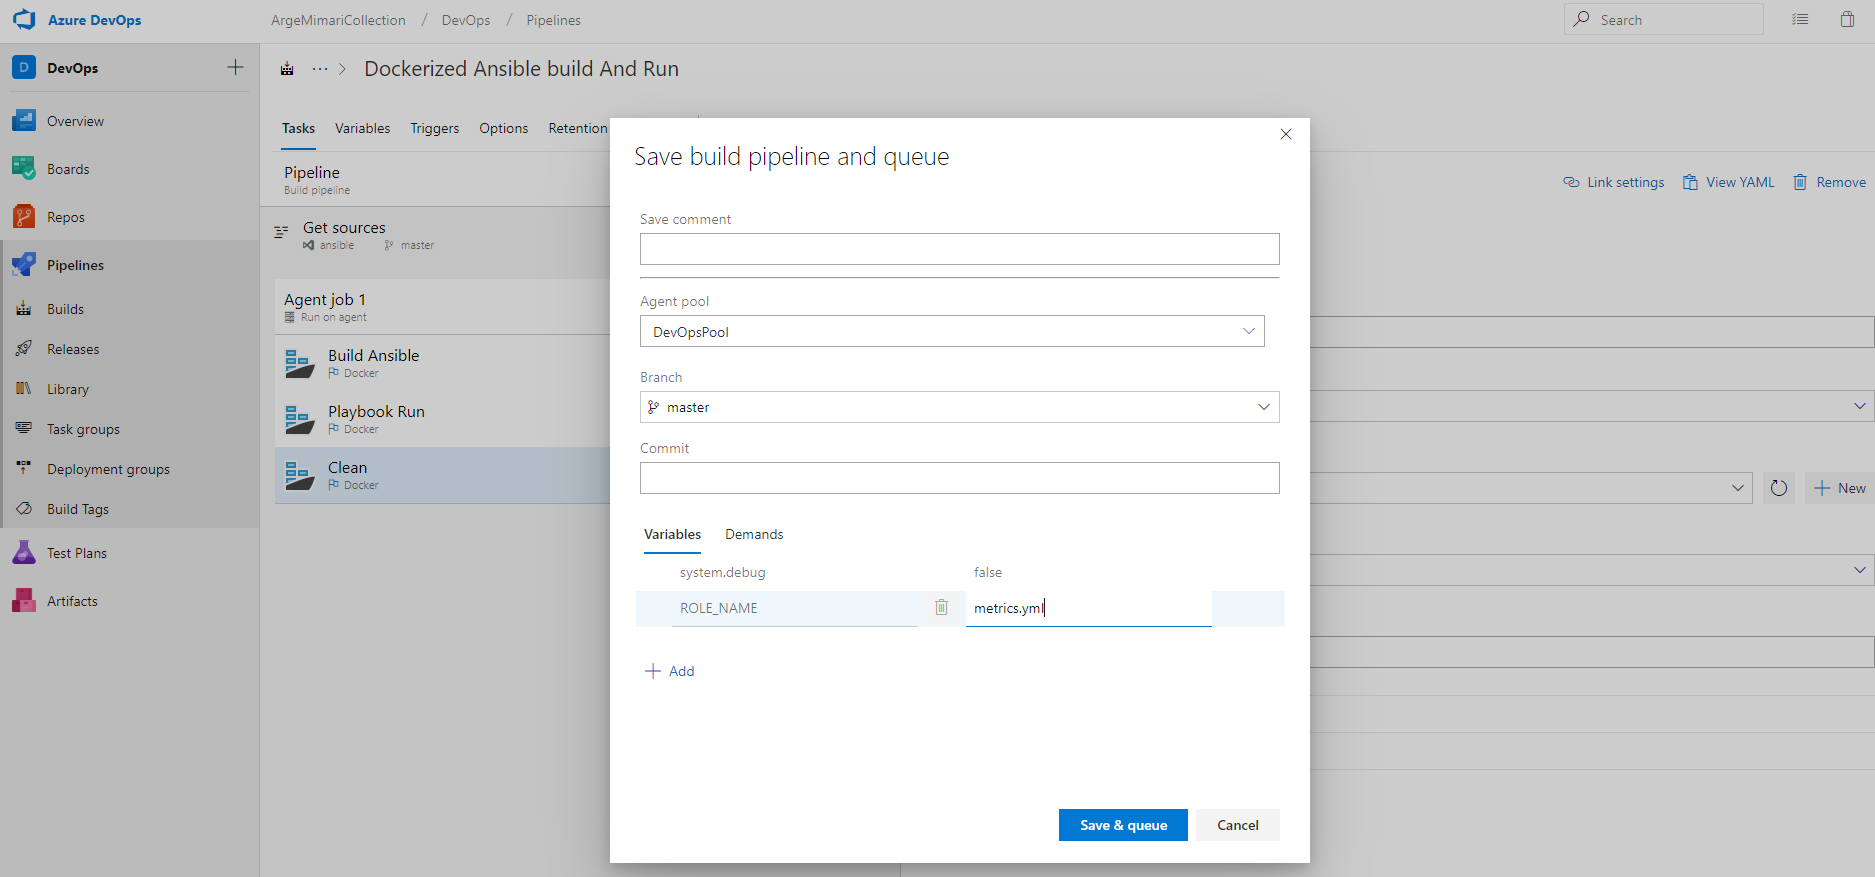
Now let us run this build step. But we have a shortcoming. We need to define the ROLE_NAME parameter in the Variable section which is in the ansible command run
— rm -e ROLE_NAME=$(ROLE_NAME)
in the Playbook running step.
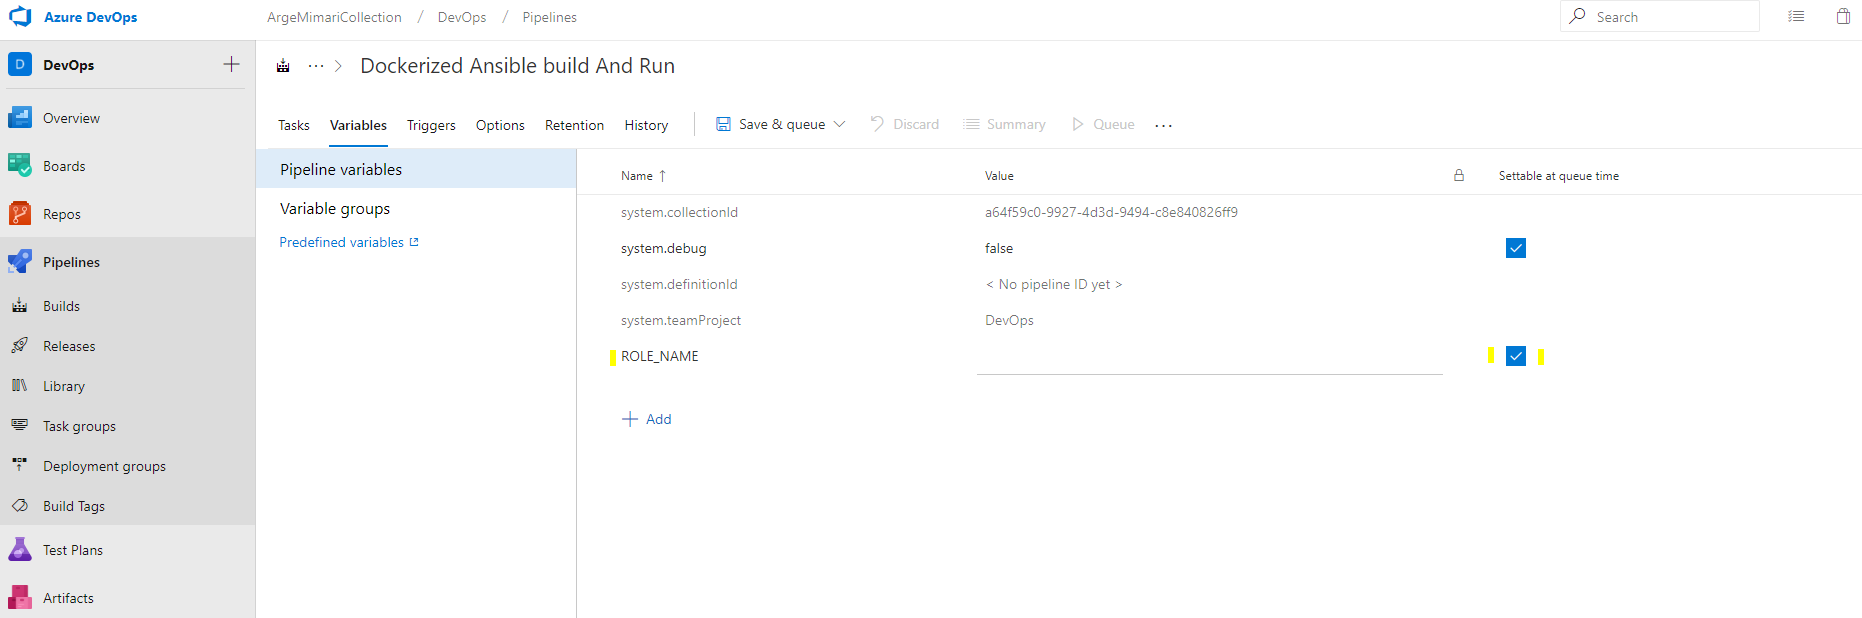
If we select the “settable at queue time” option, we need to set it at every build run time. You can also give a default value if you wish. Here you have to give the yaml file of the role you want to run. After you say save & queue, you must set and run the ROLE_NAME parameter. I set the yaml file for my Beats role. You can see the yaml file in the file structure above.
I performed these operations using the Azure DevOps Pipeline classic editor. But, if you wish, you can also examine the following yaml and prepare it in the yaml format:
pool:
name: DevOpsPool
#Your build pipeline references the ‘ROLE_NAME’ variable, which you’ve selected to be settable at queue time. Create or edit the build pipeline for this YAML file, define the variable on the Variables tab, and then select the option to make it settable at queue time. See https://go.microsoft.com/fwlink/?linkid=865971steps:
- task: Docker@0
displayName: 'Build Ansible'
inputs:
containerregistrytype: 'Container Registry'
dockerRegistryConnection: HarborRegistry
action: 'Run a Docker command'
customCommand: 'build --tag ansible .'- task: Docker@0
displayName: 'Playbook Run'
inputs:
containerregistrytype: 'Container Registry'
dockerRegistryConnection: HarborRegistry
action: 'Run a Docker command'
customCommand: : 'run --rm -e ROLE_NAME=$(ROLE_NAME) ansible'- task: Docker@0
displayName: Clean
inputs:
containerregistrytype: 'Container Registry'
dockerRegistryConnection: HarborRegistry
action: 'Run a Docker command'
customCommand: : 'rmi -f ansible'
To see an example, you can access to the repo containing several roles and dockerfile using the following link:
https://github.com/KocSistem/AnsiblePlaybook
See you in my next article :)
Useful links: