As web applications entered our lives so much and spread to such masses, the cost of interruptions started to increase. Today, most large software companies have switched to zero downtime deployment to avoid interruptions in application transitions.
In this article, I will tell you how you can perform canary release, a type of zero downtime, on Azure Kubernetes Service. My example will be from Azure Kubernetes Service, but you can try it on different Kubernetes platforms.
Canary Release on Kubernetes
If you want to perform a Canary release for your applications running on Kubernetes, you can use various release tools. For example, with release tools such as Spinnaker or Tekton, you can create your entire CI / CD line in any way you want and deploy your applications with a canary release without any interruption. The tool we will use today is
Flagger, which has been mentioned extensively in Kubecon 2020.
https://github.com/weaveworks/flagger
Flagger is not a CI / CD tool. It is a release tool written for Kubernetes. It does not do as much as the tools I mentioned above. Its only focus is release strategies. It helps you perform blue-green, A / B or canary release. You can also use it together with other CI / CD tools. When you install Flagger and let it listen to your application, for example, you can ensure deployment of your application that you updated the image tag through Azure DevOps with canary release without making any changes on the Azure DevOps side.
Another feature of Flagger is that it is easily integrated with current service mesh applications and ingress tools. There are good tutorial documents on how to use it with tools such as Istio, Linkerd, Nginx Ingress, Contour:
https://docs.flagger.app/tutorials/istio-progressive-delivery
Now let us start installing and using Flagger with Nginx Ingress.
Use of Flagger — Nginx Ingress
To install the Flagger, let us add the Helm repo to our Helm installation and run the setup command:
#Add repo
helm repo add flagger https://flagger.app#Install flagger
helm upgrade -i flagger flagger/flagger \
--namespace ingress-nginx \
--set prometheus.install=true \
--set meshProvider=nginx
Then let us install our demo application. I am installing a demo application, but you can also try it on your own existing applications. The only feature of this application is that it always calls itself. Therefore, you can see the traffic distribution more easily during the canary release.
I create the test namespace for the application and install my deployment and horizontal pod autoscaler under it:
kubectl create ns test
kubectl apply -k github.com/weaveworks/flagger//kustomize/podinfo
I install the flagger's load tester application to perform the load test, you can also load test with another application.
helm upgrade -i flagger-loadtester flagger/loadtester \
--namespace=test
In Nginx Ingress Controller, the traffic first comes to the Ingress Controller and from there it is distributed to the services based on your Ingress rules.

AKS gave the 52.236.159.38 IP address to my Ingress Controller's LoadBalancer type service. I want to give this IP to the host part of my Ingress definition, which I will create a little later. But Ingress wants a domain name from me. If you have a domain name given to the Ingress Controller for your applications, you can use it. Otherwise, you can create dns by adding your own ip to nip.io, as I did: 52.236.159.38.nip.io
I am creating my definition of ingress:
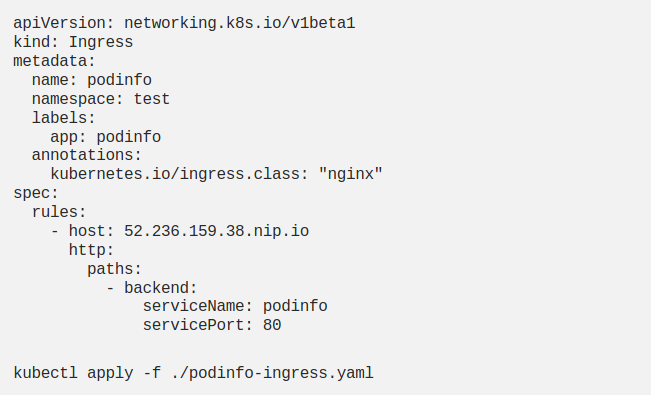
I created an ingress definition, but I did not define a service. Flagger will make this definition for me.
Canary Definition
Now I create the Canary definition with the Custom Resource Definition (CRD) created by Flagger:

Let us take a look at what we describe in this definition. I give my podinfo deployment to
targetRef, I want Flagger to run on this deployment. In the
ingressRef, I show the ingress that I just created. I show the definition of hpa in the
autoscalerRef. I pull
progressDeadlineSeconds
to 60 seconds; it will rollback if the deployment is not successful in 1 minute. I give the service information like a classic service definition.
interval
indicates the number of seconds I will go to the next step.
threshold
shows the number of attempts before the failure state will be decided, the
maxWeight
indicates load level up to which we will try the temporary canary pods.
stepWeight
specifies the percent we will increase the load rate in each step.
metrics
specifies which metrics will be used for canary analysis. Here, we want the success rate of the requests to be> 99%. However, if you wish, you can also use the metrics you get from tools such as Prometheus Operator and New Relic. But this is the subject of another article.
webhooks
are not required. For example, since my application is constantly refreshed while running, I do not have to perform a load test. But I use
-
Load test webhook
(load – test)
to test faster
-
Pre-rollout webhook
(acceptance-test)
to check if the temporary canary deployment is up and running.
I can delete the webhooks completely and open my application from the browser and create the load myself. But if I do not give enough load Canary will cancel because it cannot get enough data.
When I apply this definition, Flagger will produce the following definitions:
deployment.apps/podinfo-primary
horizontalpodautoscaler.autoscaling/podinfo-primary
service/podinfo
service/podinfo-canary
service/podinfo-primary
ingresses.extensions/podinfo-canary
Now my stable deployment is podinfo-primary. My entire load goes to these pods and my podinfo deployment is pulled to 0 replicas. I have not started a new release yet. This change is made by Flagger when I entrust my deployment to Flagger. Let us start the release now.
Canary Release
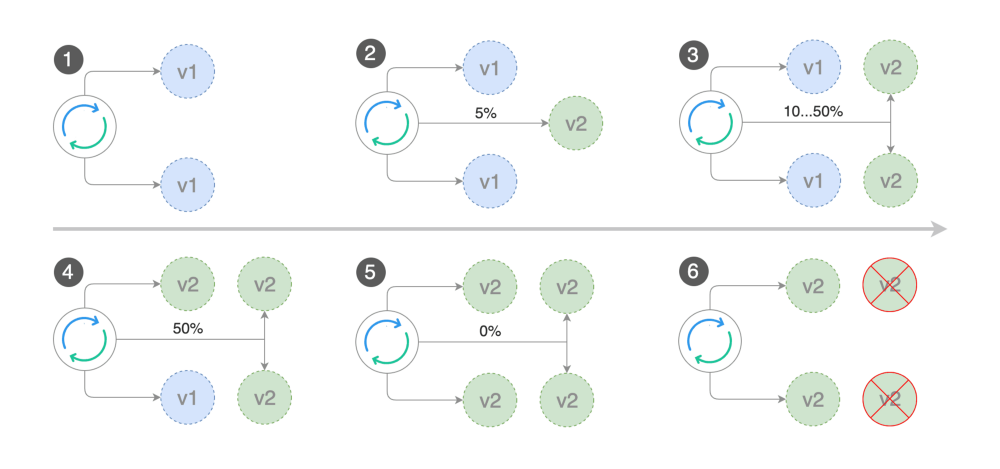
In the image above, you can think of v1 as my podinfo-primary pods and v2 as my podinfo pods.
- 1. In the 1st step, before the release begins, the load comes to
podinfo-primary
- 2. When the release starts (connected with podinfo-canary ingress and podinfo-canary service), my
podinfo
deployment's pod is deployed and% 5 load passes to this deployment.
- 3. If metrics show no problem, the load is increased to 50% step by step
- 4. If there is still no problem after 50%, the new v2 passes the test and
podinfo-primary
is updated with the new version.
- 5. After the podinfo-primary is deployed with the new version, the load is transferred to the podinfo-primary again.
- 6. The podinfo pods are deleted because they are no longer needed, and podinfo deployment returns to 0 replicas while waiting for the next release.
You can try this whole process by making the following change:
kubectl -n test set image deployment/podinfo
\podinfod=stefanprodan/podinfo:3.1.1
You can also use the following two commands to watch:
kubectl -n test describe canary/podinfo
watch kubectl get canaries -n test
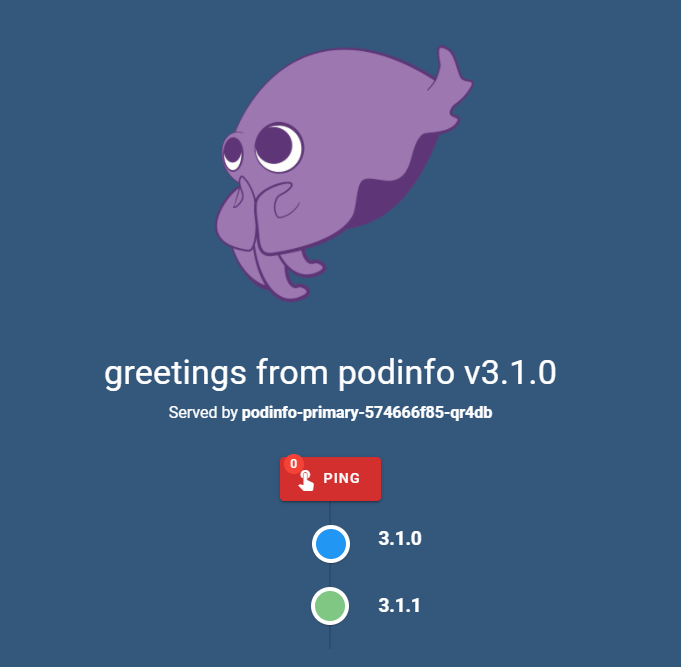
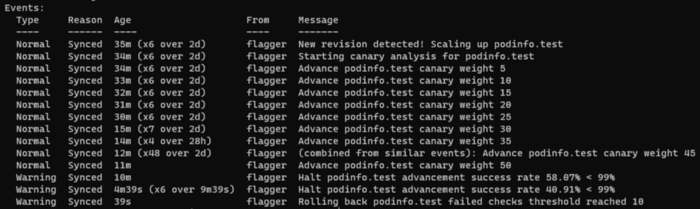
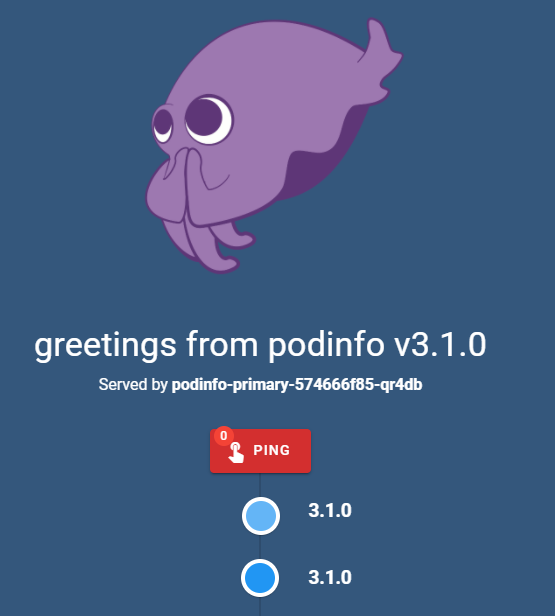
To understand better, I increased the progressDeadlineSeconds in my canary definition to 600 seconds and the interval to 60 seconds. Thus, the load increased by 5% per minute, not 10 seconds. In this process, I opened the application from my Ingress Controller's ip and saw the load gradually switch to the new version (3.1.1) and finally observed that the whole application was promoted to the new version.

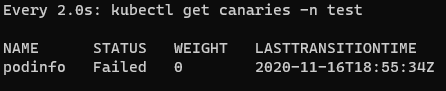
Rollback
If you want to try rollback and you are using the podinfo application, you can make the application get 500 errors regularly by running the following command during canary release. Flagger will also ensure rollback when there are failures equal to the threshold:
watch curl http://52.236.159.38/status/500
Sources