Twistlock on Azure DevOps Pipeline
Hello Everyone, :)
In this article, I will talk about how to automate the use of the container security product Twistlock (now called Prisma Cloud) on the Azure DevOps Pipeline.

Hello Everyone, :)
In this article, I will talk about how to automate the use of the container security product Twistlock (now called Prisma Cloud) on the Azure DevOps Pipeline.
First of all, in a nutshell, Twistlock, a licensed product, was purchased by Palo Alto Networks in 2019 and launched with the name Prisma Cloud.
In your container orchestration (kubernetes, openshift etc.) environments, you can perform actions such as
In addition to these, you can scan the security vulnerabilities of the images you have created and include these processes in your continuous integration processes.
Let us see how we can use Twistlock on the Azure DevOp Pipeline.
Our scenario here will be how a newly created image is scanned for vulnerabilities.
There are 2 paths we can follow:
1. Use of Azure DevOps Twistlock task
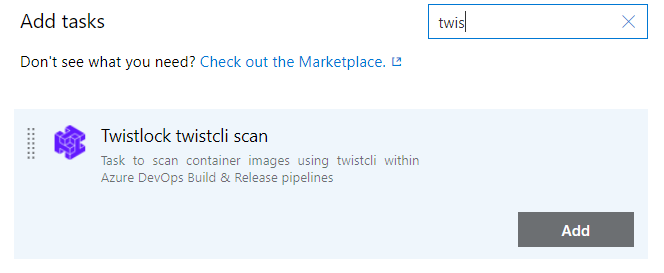
You should note that the twistcli of your twistlock application and the used cli version of that task are the same. Since there are different parameters between versions, if the parameters used in the task are not supported in the other version, the pipeline gets an error while running.
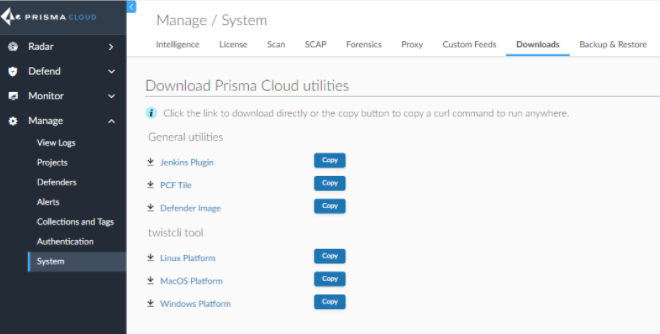
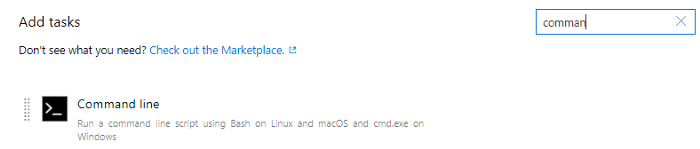
2. Use of the twistcli command with CLI
I use this method until the above-mentioned task update is available because there are version differences. I have found out that the task update is in Palo Alto's Roadmap. But we will see when they perform the development :)
Twistcli is a tool that allows the agent to talk to Twistlock. Therefore, this cli needs to be installed on your build agent. For this, you must go to manage / system / downloads tab from the twistlock interface and copy the twistcli tool command according to your operating system.
You can also do this on your pipeline.
After this process, the twistcli will be ready for use and you will be able to use this cli on the pipeline.
By adding Docker file to your Azure DevOps Pipeline / Build line, an image should be created as a result of building the relevant Dockerfile.

Parameters should be filled out as in the example below.
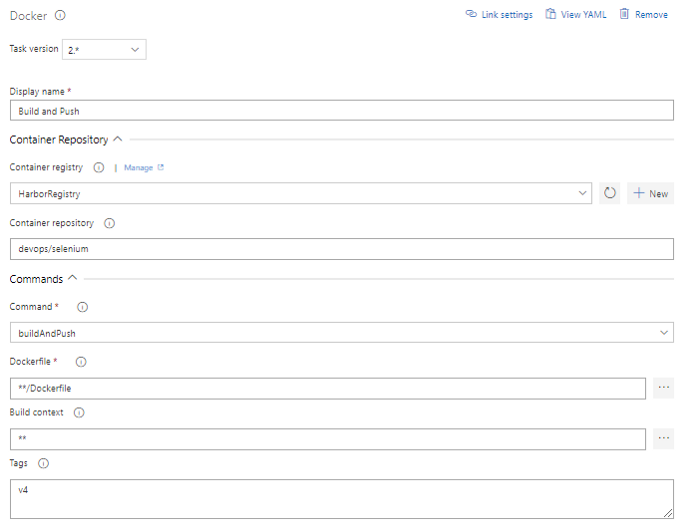
**Container Registry may vary depending on the solution you use within the company.
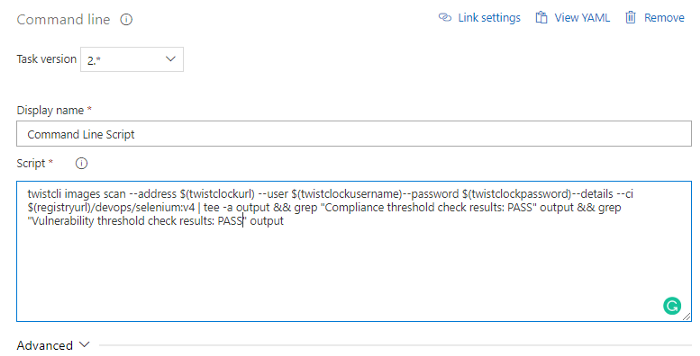
twistcli images scan — address $(twistclockurl) — user $(twistclockusername) — password $(twistclockpassword) — details — ci $(registryurl)/devops/selenium:v4 | tee -a output && grep “Compliance threshold check results: PASS” output && grep “Vulnerability threshold check results: PASS” output
After the adjustments are made, the build line should be run.
You can find detailed information about Twistcli commands from this link.
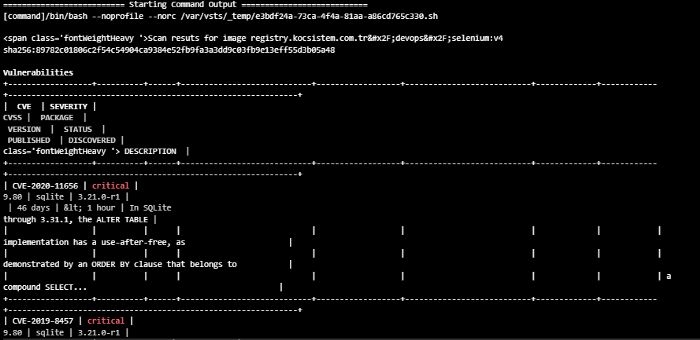
The security vulnerabilities of the relevant image are listed here.
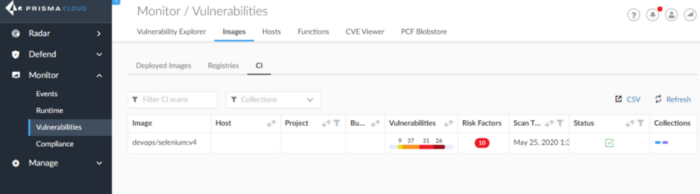
These results are sent to the Twistlock Console with the following commands written in the script: | tee -a output && grep "Compliance threshold check results: PASS" output && grep "Vulnerability threshold check results: PASS". Thus, you can view the results from the interface.
On the console, you can see the scanning results at: Monitor > Vulnerabilities > Images > CI yada Monitor > Compliance> Images > CI
See you in my next article 😊